Shelly Garage Door with Google Smarthome
Matthias Baldi, 3/12/2025
en
Requirements / Background
- Existing NodeRED Installation
- Existing MQTT Broker
- A compatible garage door
- A Shelly 1 or a 24V compatible Shelly device
- Optional a Shelly Door/Window Sensor
Current Situation
Five years ago, when we moved into our house, we installed a new garage door from SOMMER. It came with a standard remote control operating at 868MHz to open and close the garage door, but it lacked any pre-installed capability to control the door via smartphone or even Android Auto/Google Assistant. After moving in, I started looking for a solution to control the garage door with a Shelly 2.5, but other priorities took over, and the project was put on hold.
Recently, a colleague of mine faced a similar issue with a different type of garage door and resolved it using a prebuilt appliance from Meross. My goal for my smart home environment is to minimize cloud dependencies as much as possible. Additionally, I had concerns about whether Meross provided the necessary APIs to integrate it into my existing MQTT/Node-RED setup.
Hardware Solution / MQTT Integration
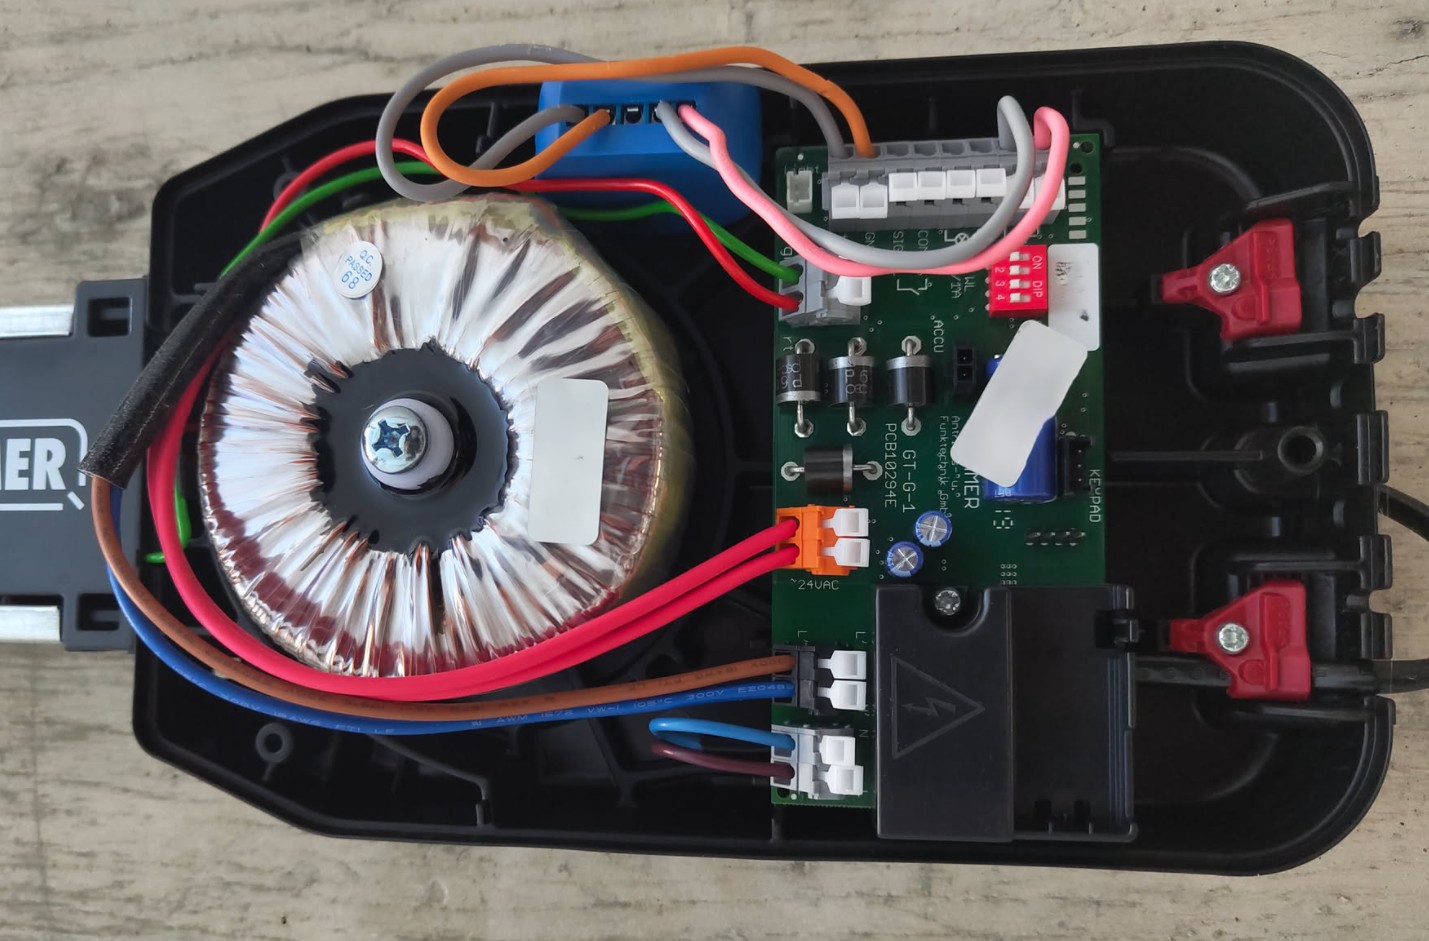
First, I examined the control unit of the garage door to gather any information or numbers about it. After disconnecting the SOMMER control unit from AC power, I noticed that the small board had multiple connectors, including:
- 24V/1A external light (which I don’t use)
- Connectors for an external push button (later used for the Shelly 1)
- Connectors for 24V +/- (which I used to power the Shelly 1)
“Attention: You should have some basic knowledge about electrical installations and the risks of working with 230V AC, even though the Shelly 1 is powered by 24V DC in this case. If you are unsure about the installation, please consult a professional electrician.
Improper handling can lead to serious injuries or even death!
I decided to connect the Shelly 1 directly to the 24V +/- as the power source because the Shelly 1 supports 110/240V AC or 12V/24-60V DC. Since my garage already had a 2.4GHz WiFi signal, the communication with the network was not a problem. I used the O and I connectors of the Shelly 1 to connect to the push button on the garage door board.
Because the door only required an impulse to open or close, I configured the Shelly 1 to switch the relay off after 1 second. Please ignore the colors of the cables 😉 I used what I had available.
To connect the Shelly 1 to my MQTT broker, I used the Shelly 1’s MQTT feature and configured it to send a message to the broker when the relay is switched and to receive commands from the MQTT broker.
Google Smarthome Integration
To use the garage door with Android Auto, I found no simpler solution than to use the Google Assistant integration. In my opinion, this is the easiest way to integrate custom devices into Android Auto with the shortcut feature. The integration for Google Smart Home was straightforward thanks to the Node-RED Google Smart Home node. Thank you, Michael Jacobsen, for this great node and excellent documentation and guides!
More details and the code for this article you can find here:
mikejac/node-red-contrib-google-smarthomeIf you follow the above-linked setup guide, you will have a working Google Smart Home integration with Google Assistant in less than 30 minutes.
In Node-RED, I created a flow that listens to Google Smart Home commands and sends the commands to the MQTT broker to control the garage door. Additionally, I created a flow that listens to MQTT messages from the Shelly Door/Window sensor and sends the status back to Google Smart Home. This is not particularly useful in my case, but it works.

As soon as the integration (device) is added in Node-RED, you should be able to see a Google Home device in your app. You can then add the device to a room and control it with your voice or with Google Assistant.
After that, you are ready to add an Android Auto Shortcut under Settings -> Android Auto (you might need to search for it) -> Customize Launcher -> Add a shortcut to the Launcher.
There, you can select An Assistant action and enter a friedly name and the command you want to execute, such as Open the garage door.
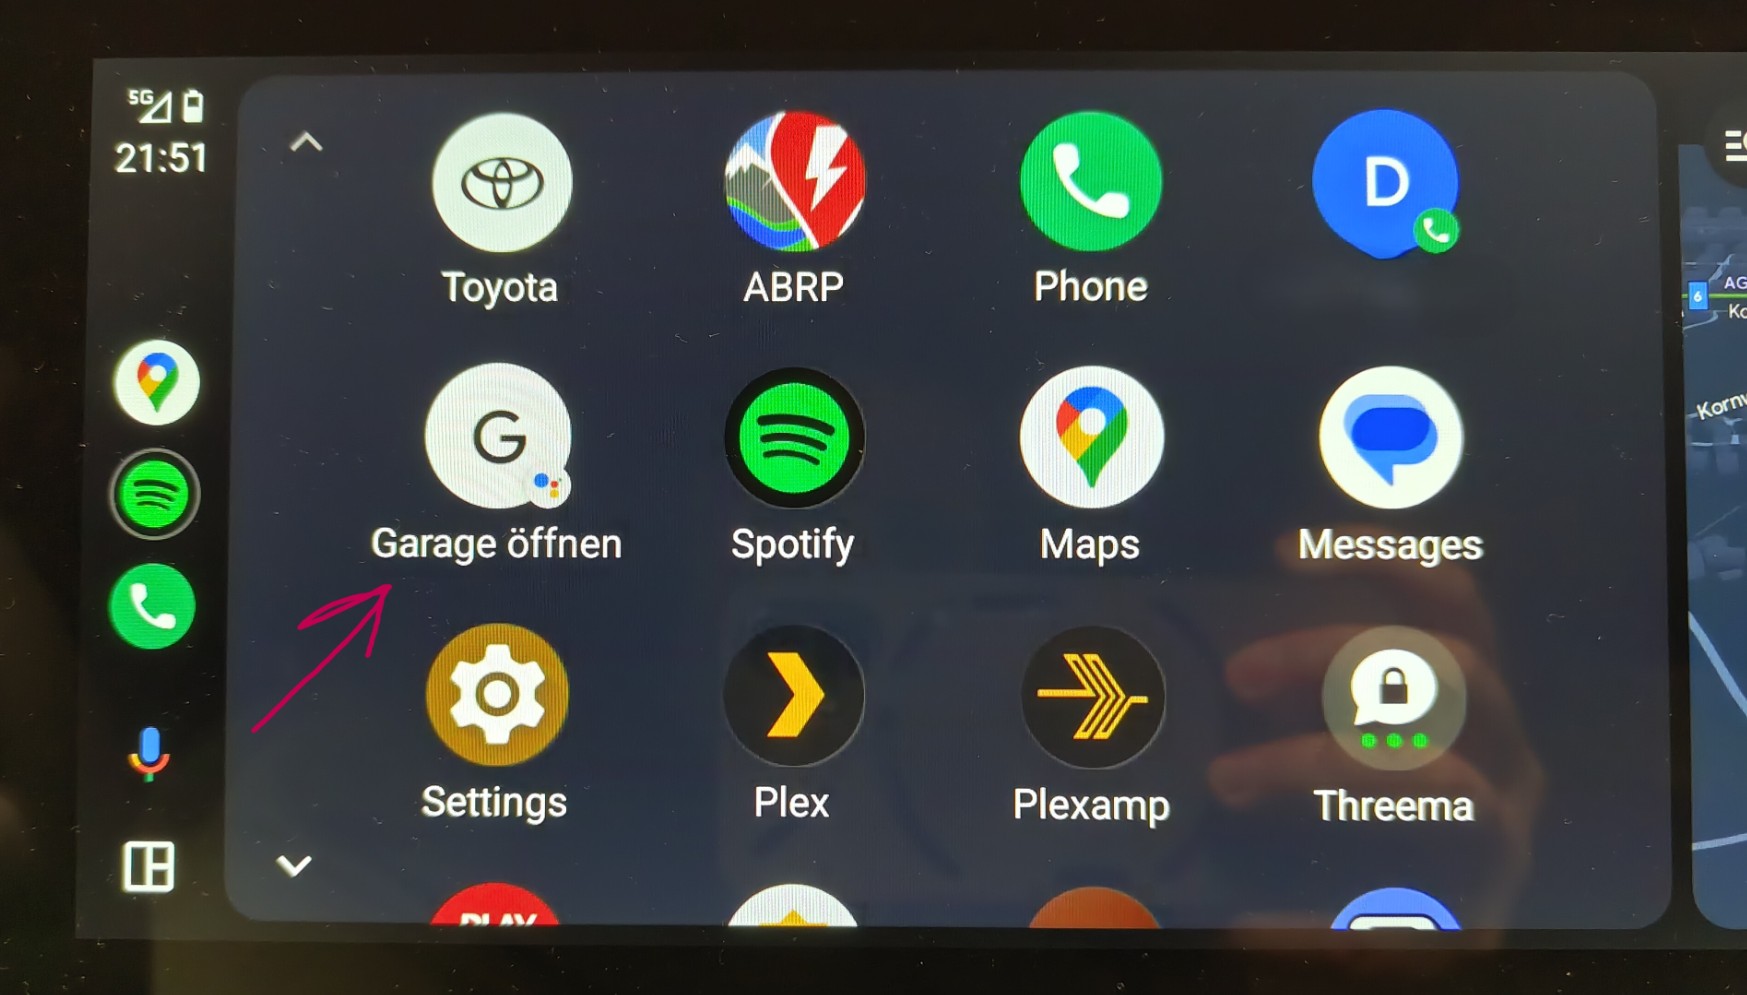
You then have two options to open the door while driving:
- Say
Hey Google, open the garage doorand the door will open. - Press the shortcut button in the Android Auto Launcher, and the door will open.
Conclusion
The integration of the garage door into the Google Smart Home was a rewarding project. It is now much more comfortable to open the garage door with a voice command or a button press on Android Auto without searching for the remote control in the car.
includes Le Chat (Mistral AI) enhanced & corrected text blocks